¶ HDMI 屏幕

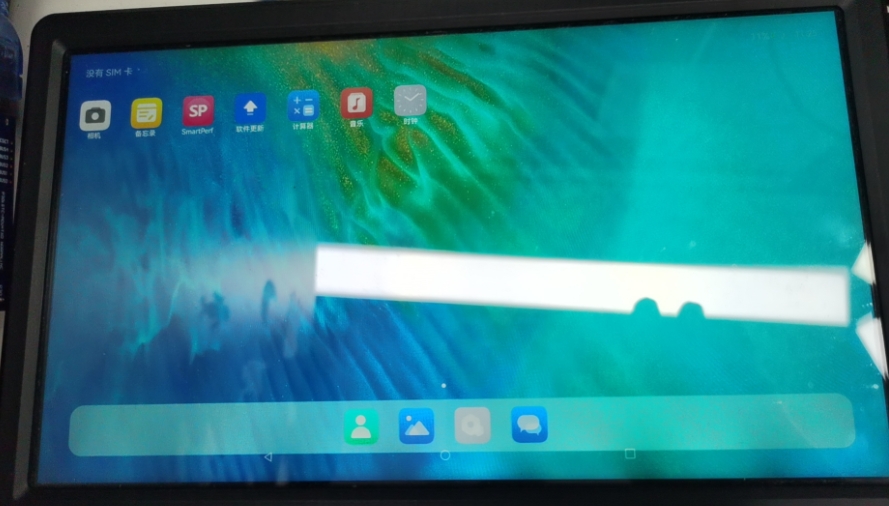
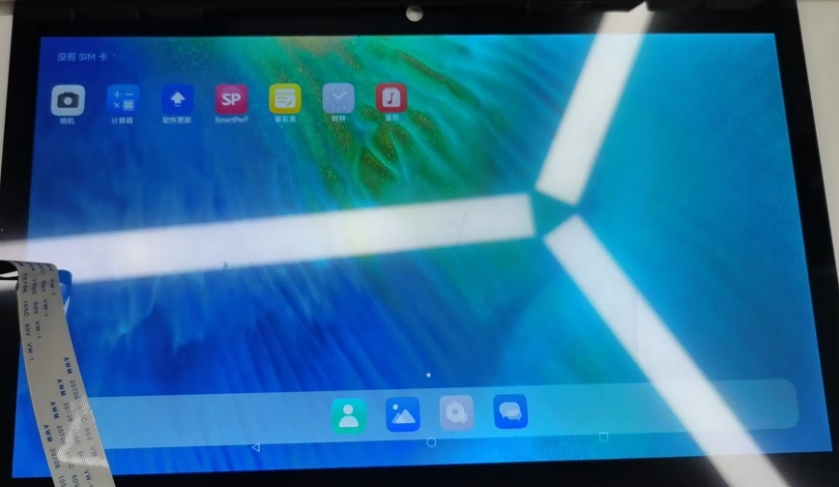
- 工程默认打开了hdmi和mipi两种显示,这会导致hdmi默认使用了mipi配置的分辨率,将route_dsi0和dsi0去使能, 如下图:
&route_dsi0 {
    status = "okay";
};

&dsi0 {
    status = "okay";

     dsi0_panel: panel@0 {
   .....
- 显示效果:

¶ 7寸MIPI屏
YYT-MIPI7LCD2203 是一个5点电容触控、7英寸彩色 TFT-LCD 模块。该模块由以下部分组成,TFT LCD 面板、驱动电路、5点电容触控和背光。
其中 5 点电容触控拥有 26 个驱动通道和 14 个感应通道,能够满足更高的 touch 精度要求。可以同时识别 5 个触摸点位的实时准确位置、移动轨迹及触摸面积。并根据主控需求,读取相应点数的触摸信息。

YY3568提供了两个DSI接口,分别为:DSI0和DSI1,一下我们以DSI1的配置来描述。
7寸MIPI屏我们需要控制一些引脚才能点亮屏幕,屏幕硬件原理图如下:
- 背光引脚:LCD1_BL_PWM5
- 背光使能引脚:GPIO3_A5
- 使能引脚:GPIO4_D2
- 复位引脚:GPIO3_A2

YYT-MIPI7LCD2203驱动的设备树配置rk3568-vp1-mipi-dsi1-1024x768.dtsi.
我们需要根据YYT-MIPI7LCD2203屏幕的配置更新dsi1节点:
- 屏幕固件参数:panel-init-sequence
- 屏幕显示参数:disp_timings1
- 屏幕使能引脚:enable-gpios
- 屏幕复位引脚:reset-gpios
&dsi1 {
    status = "okay";
    dsi1_panel: panel@0 {
        status = "okay";
        compatible = "simple-panel-dsi";
        reg = <0>;
        backlight = <&backlight1>;

        enable-gpios = <&gpio4 RK_PD2 GPIO_ACTIVE_LOW>;
        reset-gpios = <&gpio3 RK_PA2 GPIO_ACTIVE_LOW>;
        reset-delay-ms = <60>;
        enable-delay-ms = <60>;
        prepare-delay-ms = <60>;
        unprepare-delay-ms = <60>;
        disable-delay-ms = <60>;
        dsi,flags = <(MIPI_DSI_MODE_VIDEO | MIPI_DSI_MODE_VIDEO_BURST |
            MIPI_DSI_MODE_LPM | MIPI_DSI_MODE_EOT_PACKET)>;
        dsi,format = <MIPI_DSI_FMT_RGB888>;
        dsi,lanes  = <4>;
        panel-init-sequence = [
            15 00 02 80 ac
            15 00 02 81 b8
            15 00 02 82 09
            15 00 02 83 78
            15 00 02 84 7f
            15 00 02 85 bb
            15 00 02 86 70
        ];

        panel-exit-sequence = [
            05 00 01 28
            05 00 01 10
        ];

        disp_timings1: display-timings {
            native-mode = <&dsi1_timing0>;
            dsi1_timing0: timing0 {
                clock-frequency = <65000000>;
                hactive = <1024>;
                vactive = <600>;
                hfront-porch = <160>;
                hback-porch = <160>;
                hsync-len = <10>;
                vfront-porch = <12>;
                vsync-len = <1>;
                vback-porch = <23>;
                hsync-active = <0>;
                vsync-active = <0>;
                de-active = <1>;
                pixelclk-active = <0>;
            };
        };

        ports {
            #address-cells = <1>;
            #size-cells = <0>;

            port@0 {
                reg = <0>;
                panel_in_dsi1: endpoint {
                    remote-endpoint = <&dsi1_out_panel>;
                };
            };
        };
    };

    ports {
        #address-cells = <1>;
        #size-cells = <0>;

        port@1 {
            reg = <1>;
            dsi1_out_panel: endpoint {
                remote-endpoint = <&panel_in_dsi1>;
            };
        };
    };

};
屏幕背光配置:
- 背光使能引脚:enable-gpios
- 使能背光调节pwm:pwm5
&backlight1 {
    status = "okay";
    enable-gpios = <&gpio3 RK_PA5 GPIO_ACTIVE_HIGH>;
};

&pwm5 {
    status = "okay";
};
设置输出屏幕输出端口到vp1:
&route_dsi1 {
    status = "okay";
    connect = <&vp1_out_dsi1>;
};
显示结果:

¶ 触摸驱动
由原理图上看,mipi dsi1屏幕的触摸芯片接在i2c5上,触摸芯片采用gt911芯片,参数如下:
- i2c地址为:0x5d
- 屏幕分辨率为:1024 * 600
- 中断引脚:GPIO0-C1
- 复位引脚:GPIO3-A0
&i2c5{
    status = "okay";
    gt9xx: gt9xx@5d {
        compatible = "goodix,gt9xx";
        reg = <0x5d>;
        touch-gpio = <&gpio0 RK_PC1 IRQ_TYPE_EDGE_RISING>;
        reset-gpio = <&gpio3 RK_PA0 GPIO_ACTIVE_LOW>;
        max-x = <1024>;
        max-y = <600>;
        tp-size = <911>;
        pinctrl-names = "default";
        pinctrl-0 = <&touch_gpio>;
        //tp-supply = <&vcc_io>;
        status = "okay";
    };
};

&pinctrl {
    touch {
        touch_gpio: touch-gpio {
            rockchip,pins =
                <0 RK_PC1 RK_FUNC_GPIO &pcfg_pull_up>,
                <3 RK_PA0 RK_FUNC_GPIO &pcfg_pull_none>;
        };
    };
};
通过menuconfig打开gt911的驱动:
  │   Location:                                                                                                                                                │
  │     -> Device Drivers                                                                                                                                      │
  │       -> Input device support                                                                                                                              │
  │         -> Generic input layer (needed for keyboard, mouse, ...) (INPUT [=y])                                                                              │
  │           -> Touchscreens (INPUT_TOUCHSCREEN [=y])

¶ 11.6寸EDP屏
youyeetoo EDP 屏一个5点电容触控、11.6 英寸彩色 TFT-LCD。具有FHD(全高清)分辨率(1920水平×1080垂直像素阵列),
可显示 16.7M(1670万) 种色彩,接近人眼分辨的极限。具有显示画面色彩丰富,层次感好,色彩过渡自然,色彩表现力好,
屏幕细腻等优点。并且屏幕重量仅有96.6g。

11.6寸EDP屏我们需要控制一些引脚才能点亮屏幕,屏幕硬件原理图如下:
- 背光引脚:LCD1_BL_PWM14
- 背光使能引脚:GPIO1_A4

YYT-MIPI7LCD2203驱动的设备树配置rk3568-vp1-edp-1080p.dtsi.
我们需要根据YYT-MIPI7LCD2203屏幕的配置更新dsi1节点:
- 屏幕固件参数:panel-init-sequence
- 屏幕显示参数:display-timings
- 屏幕使能引脚:enable-gpios
- 屏幕复位引脚:reset-gpios
edp_panel {
        compatible = "simple-panel";
        backlight = <&backlight>;
        //power-supply = <&vcc3v3_lcd0_n>;
        prepare-delay-ms = <120>;
        enable-delay-ms = <120>;
        unprepare-delay-ms = <120>;
        disable-delay-ms = <120>;

        display-timings {
            native-mode = <&edp_timing>;

            edp_timing: timing0 {
                clock-frequency = <138500000>;
                hactive = <1920>;
                vactive = <1080>;
                hfront-porch = <64>;
                hsync-len = <32>;
                hback-porch = <64>;
                vfront-porch = <12>;
                vsync-len = <7>;
                vback-porch = <12>;
                hsync-active = <0>;
                vsync-active = <0>;
                de-active = <0>;
                pixelclk-active = <0>;
            };
        };

        port {
            panel_in_edp: endpoint {
                remote-endpoint = <&edp_out_panel>;
            };
        };
    };

&edp {
    status = "okay";
    force-hpd;

    ports {
        port@1 {
            reg = <1>;

            edp_out_panel: endpoint {
                remote-endpoint = <&panel_in_edp>;
            };
        };
    };
};
屏幕背光配置:
- 背光使能引脚:enable-gpios
- 使能背光调节pwm:pwm14
&backlight {
    status = "okay";
    pwms = <&pwm14 0 25000 0>;
    enable-gpios = <&gpio1 RK_PA4 GPIO_ACTIVE_HIGH>;
};

&pwm14 {
    status = "okay";
};
设置输出屏幕输出端口到vp1:
&route_edp {
    status = "okay";
    connect = <&vp1_out_edp>;
};
显示结果:

¶ 触摸驱动
由原理图上看,EDP屏幕的触摸芯片接在i2c1上,触摸芯片采用gt911芯片,参数如下:
- i2c地址为:0x5d
- 屏幕分辨率为:1920 * 1080
- 中断引脚:GPIO0-B7
- 复位引脚:GPIO3-A6
&i2c1 {
    status = "okay";
    gt9xx: gt9xx@5d {
        compatible = "goodix,gt9xx";
        reg = <0x5d>;
        touch-gpio = <&gpio0 RK_PB7 IRQ_TYPE_EDGE_RISING>;
        reset-gpio = <&gpio0 RK_PA6 GPIO_ACTIVE_LOW>;
        max-x = <1920>;
        max-y = <1080>;
        tp-size = <928>;
        pinctrl-names = "default";
        pinctrl-0 = <&touch_gpio>;
        //tp-supply = <&vcc_io>;
        status = "okay";
    };
};

&pinctrl {
    touch {
        touch_gpio: touch-gpio {
            rockchip,pins =
                <0 RK_PB7 RK_FUNC_GPIO &pcfg_pull_up>,
                <0 RK_PA6 RK_FUNC_GPIO &pcfg_pull_none>;
        };
    };
};
通过menuconfig打开gt911的驱动:
  │   Location:                                                                                                                                                │
  │     -> Device Drivers                                                                                                                                      │
  │       -> Input device support                                                                                                                              │
  │         -> Generic input layer (needed for keyboard, mouse, ...) (INPUT [=y])                                                                              │
  │           -> Touchscreens (INPUT_TOUCHSCREEN [=y])
