¶ Ubuntu GPIO操作指南
本文将介绍用户空间如何使用RK3588的GPIO。
硬件:yy3588开发板 固件:yy3588_ubuntu22.04_linux6.1_release_v1.1_dsi0.img
¶ 1. GPIO基础知识
¶ 1.1 RK3588的GPIO编号系统
RK3588的GPIO采用标准的Linux GPIO编号系统。
¶ 1.1.1 基础结构
-
每个bank有32个引脚
-
每个bank分为4组,每组8个引脚
- A组(PA):0-7
- B组(PB):8-15
- C组(PC):16-23
- D组(PD):24-31
¶ 1.2 引脚编号计算方式
¶ 1.2.1 计算公式
Linux GPIO编号 = bank编号 × 32 + 组内偏移量
¶ 1.2.2 组内偏移量对照表
在kernel/arch/include/dt-bindings/pinctrl/rockchip.h中包含各个引脚的偏移定义:
#define RK_PA0  0
#define RK_PA1  1
...
#define RK_PA7  7
#define RK_PB0  8
...
#define RK_PB7  15
#define RK_PC0  16
...
#define RK_PC7  23
#define RK_PD0  24
...
#define RK_PD7  31
¶ 1.2.3 实际计算示例
| 引脚名称 | 计算过程 | Linux GPIO编号 |
|---|---|---|
| GPIO0_A0 | 32 × 0 + 0 = 0 | 0 |
| GPIO1_B5 | 32 × 1 + 13 = 45 | 45 |
| GPIO2_B2 | 32 × 2 + 10 = 74 | 74 |
| GPIO4_C5 | 32 × 4 + 21 = 149 | 149 |
| GPIO4_D7 | 32 × 4 + 31 = 159 | 159 |
¶ 1.3 实际可用GPIO引脚
YY3588开发板上实际存在且引出到插针的GPIO:
| 引脚名称 | Linux GPIO编号 |
|---|---|
| GPIO4_C4 | 148 |
| GPIO4_C5 | 149 |
| GPIO2_B2 | 74 |
| GPIO0_B0 | 8 |
| GPIO2_B1 | 73 |
| GPIO2_C0 | 80 |
| GPIO4_C3 | 147 |
| GPIO0_C5 | 21 |
¶ 1.4 引脚编号计算工具
在package/scripts/00GPIO/目录下存在一个名为calculator_gpio.py的脚本,用于快速计算GPIO编号。
¶ 使用方式
将要计算的引脚作为参数进行传递,可以传递多个参数,每个参数之间用空格隔开。参数可以使用完全名称或缩写名称,不区分大小写:
python calculator_gpio.py GPIO1_A1 1_A1 2A1 GPIO0_B0
输出如下:
GPIO1_A1             -> bank=1, offset= 1, Linux GPIO 编号 = 33
1_A1                 -> bank=1, offset= 1, Linux GPIO 编号 = 33
2A1                  -> bank=2, offset= 1, Linux GPIO 编号 = 65
GPIO0_B0             -> bank=0, offset= 8, Linux GPIO 编号 = 8
adb环境下没有python环境可以使用calculator_gpio.sh进行计算,用法跟calculator_gpio.py相同。
./calculator_gpio.sh GPIO1_A1 1_A1 2A1 GPIO0_B0
¶ 2. 用户空间GPIO控制
¶ 2.1 适用场景
主要用于快速验证GPIO的功能,或者需要使用shell脚本联动的场景,无需第三方依赖,为测试方便,已将有关GPIO的操作编写为脚本。
¶ 2.2 脚本操作
¶ 2.2.1 脚本列表
| 脚本名称 | 功能描述 |
|---|---|
export.sh |
导出GPIO引脚到用户空间 |
unexport.sh |
释放GPIO引脚 |
get.sh |
查询GPIO当前状态 |
set.sh |
设置GPIO方向和电平 |
blink.sh |
周期性切换GPIO电平(LED闪烁) |
tests.sh |
自动化测试所有GPIO功能 |
¶ 2.2.2 硬件及连接
本文使用LED等模块来测试GPIO的功能,模块如下,需要接三根线,VCC、GND、IN输入控制引脚,IN的输入为高电平,LED亮起,为低电平,LED熄灭。
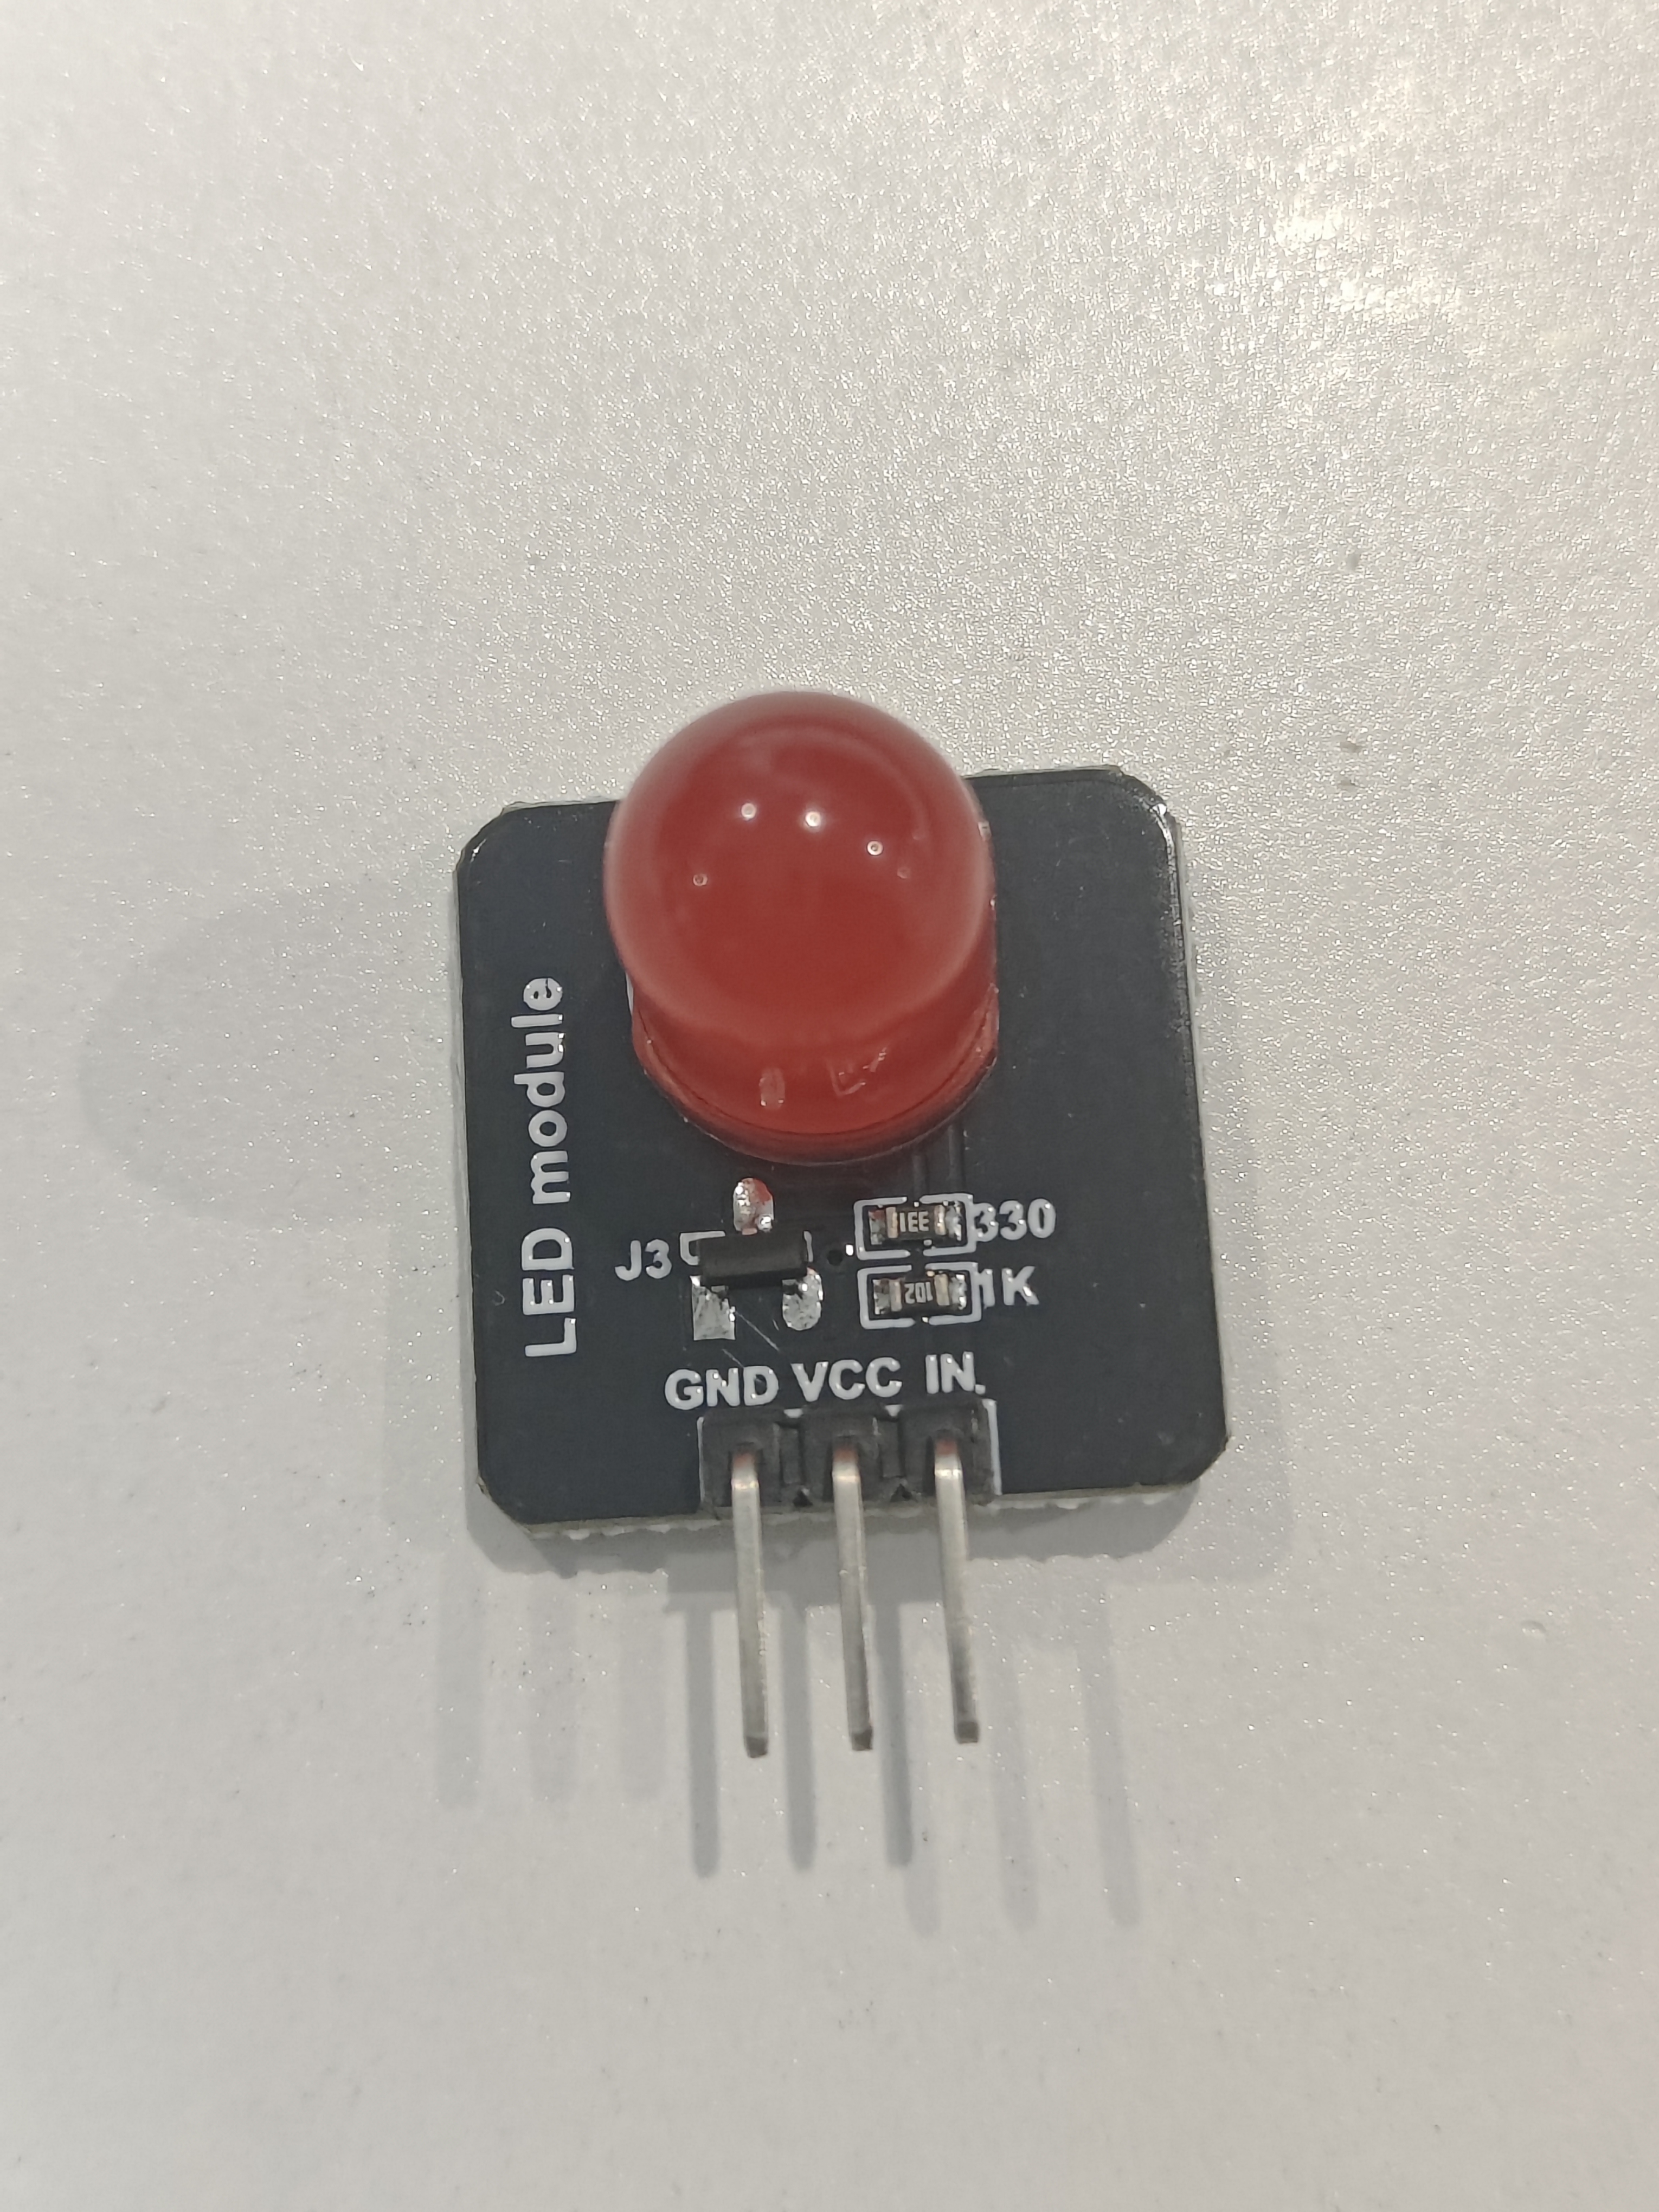
| 开发板 | LED |
|---|---|
| VCC3V3_SYS | VCC |
| GND | GND |
| GPIO4_C5 | IN |
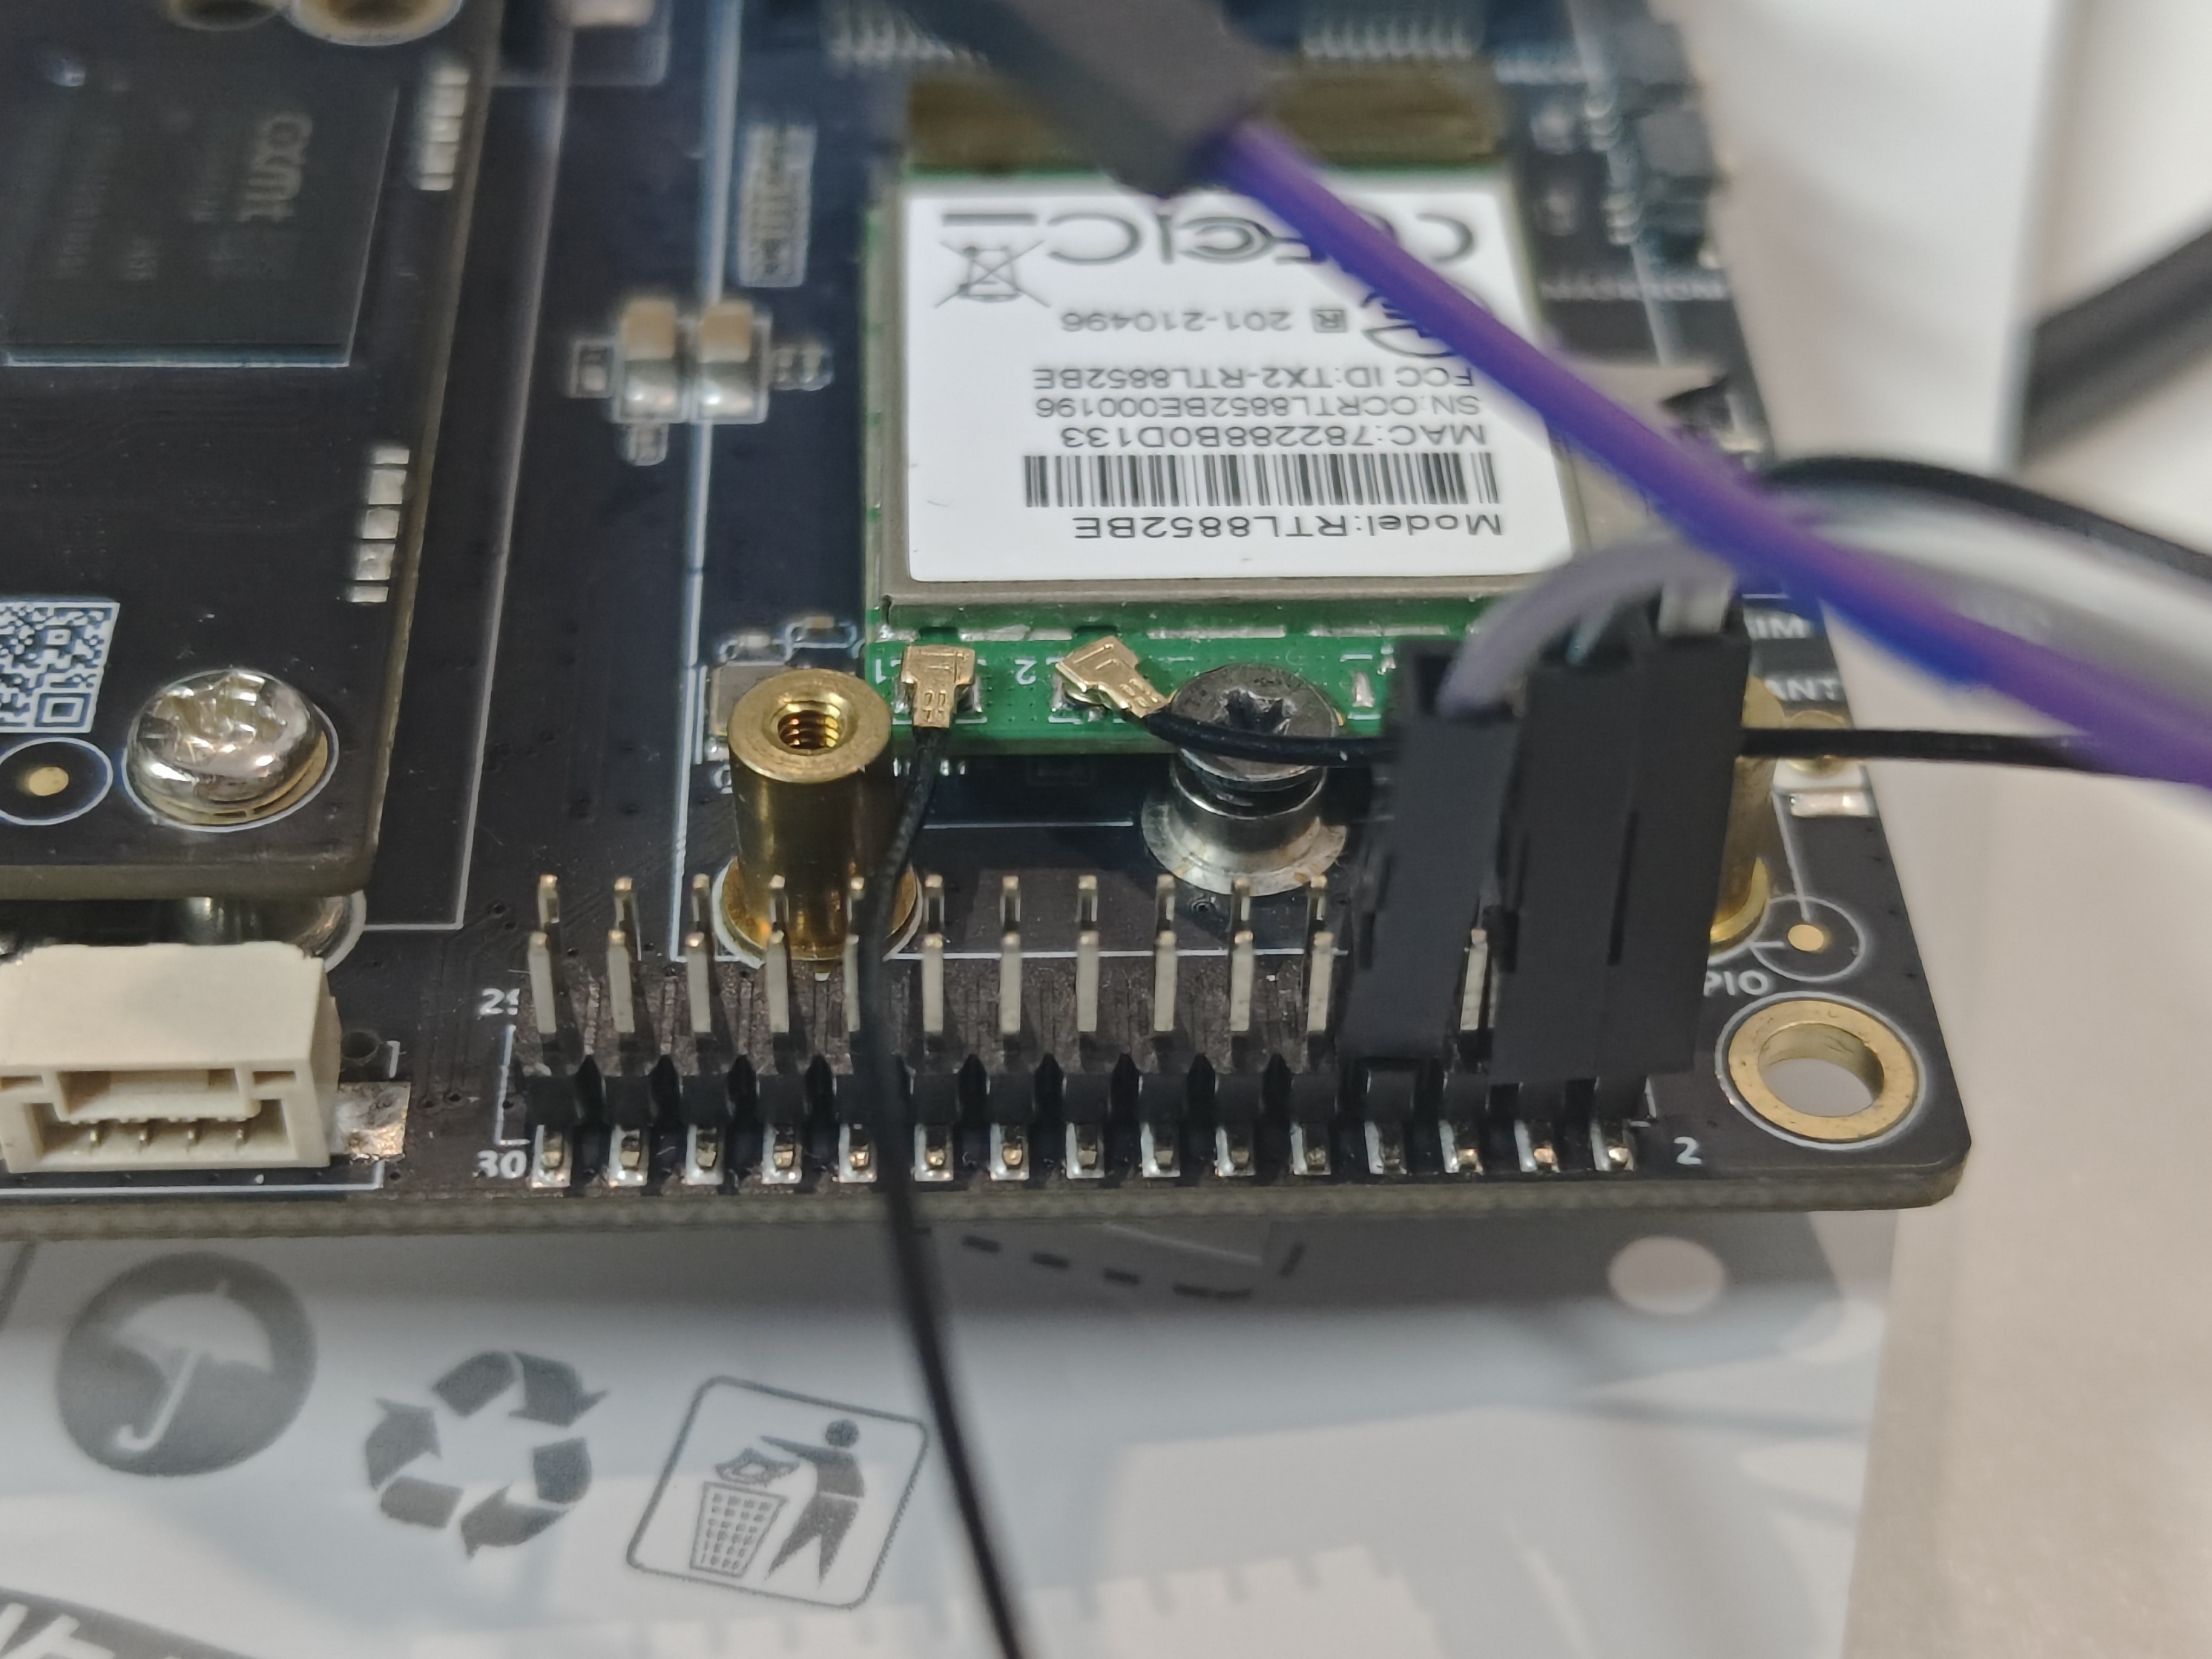
引脚对应的位置可以根据板子上面的丝印和硬件接口图进行确定,本文使用的VCC3V3_SYS,GND,GPIO4_C5分别对应30pin插针的第2,4,8号位置,接线示意图如下
¶ 2.2.3 ADB上传脚本到开发板
将开发板连接到PC,打开PC的命令行或者Powershell,然后使用ADB命令上传脚本到开发板,下面的D:\package\scripts\00GPIO\adb是脚本在PC上的目录需要替换为自己的真实路径,/home/youyeetoo/adb是开发板上的adb的目录,需要根据实际情况修改:
adb devices # 检查设备连接
adb push D:\package\scripts\00GPIO\adb /home/youyeetoo # 上传
adb shell # 进入开发板shell
cd /home/youyeetoo/adb # 切换到上传目录
chmod a+x *.sh # 给所有脚本添加执行权限
笔者这里使用直接上传了script目录
PS C:\Users\youyeetoo> adb devices
List of devices attached
52d4c5b82df38192        device

PS C:\Users\youyeetoo> adb push D:\package\scripts /home/youyeetoo
D:\package\scripts\: 10 files pushed, 0 skipped. 4.8 MB/s (37482 bytes in 0.007s)

PS C:\Users\youyeetoo> adb shell
root@YY3588:/# cd /home/youyeetoo/scripts/00GPIO/adb/
root@YY3588:/home/youyeetoo/scripts/00GPIO/adb# chmod a+x *.sh
root@YY3588:/home/youyeetoo/scripts/00GPIO/adb#
¶ 2.2.4 Ubuntu系统使用脚本
使用ADB上传的脚本只在ADB中可见,在Ubuntu系统中使用脚本时需要使用其他方式上传如U盘,或者网络上传。Linux专用的脚本在package/scripts/00GPIO/Linux目录下,在Ubuntu系统下运行时需要root权限而ADB本身就有root权限,所以脚本略有不同。上传脚本之后按照前面的流程赋予执行权限即可,其他操作跟在ADB中操作一致。
¶ 2.2.5 脚本使用方法
以下执行脚本都在ADB的 /home/youyeetoo/scripts/00GPIO/adb 目录下执行,所有脚本在不加任何参数运行的时候都会打印脚本的使用方法。如export.sh脚本,不加参数直接执行./export.sh,会输出以下内容:
root@YY3588:/home/youyeetoo/scripts/00GPIO/adb# ./export.sh
Usage: ./export.sh <gpio_number>
Example: ./export.sh 149
- 导出GPIO
使用以下命令可以导出GPIO引脚编号为149的GPIO引脚(GPIO4_C5)。
root@YY3588:/home/youyeetoo/scripts/00GPIO/adb# ./export.sh 149
GPIO149 exported successfully
path: /sys/class/gpio/gpio149
- 获取GPIO方向和电平
可以使用get.sh脚本查询某个引脚的状态,该脚本首先会判断对应的引脚是否被导出到用户空间,如果没有导出,会提示用户先导出引脚,否则打印该引脚的信息,包括方向和电平。
root@YY3588:/home/youyeetoo/scripts/00GPIO/adb# ./get.sh 149
GPIO149 is exported
-----------------------------------
Direction: in
Value:     0 (LOW)
-----------------------------------
Path: /sys/class/gpio/gpio149
- 设置GPIO方向和电平
set.sh脚本用于设置GPIO引脚的方向和电平,使用的时候要传递三个参数。分别为引脚编号、方向(in/out)和电平(0/1)。例如设置149为输出高电平(HIGH):
root@YY3588:/home/youyeetoo/scripts/00GPIO/adb# ./set.sh 149 out 1
GPIO149 direction set to: out
GPIO149 value set to: 1 (HIGH)
-----------------------------------
Current status:
GPIO149 is exported
-----------------------------------
Direction: out
Value:     1 (HIGH)
-----------------------------------
Path: /sys/class/gpio/gpio149
- 释放GPIO
unexport.sh脚本用于释放GPIO引脚,使用的时候传递一个参数,即引脚编号,释放前会将该引脚设置为输入低电平。例如释放149:
root@YY3588:/home/youyeetoo/scripts/00GPIO/adb# ./unexport.sh 149
Preparing GPIO149 for unexport...
Set to output LOW
Set to input mode
GPIO149 unexported successfully
- 测试GPIO功能
tests.sh脚本用于自动化测试所有GPIO功能,包括导出、设置方向和电平、查询状态、释放等,并输出测试结果。用于测试某个引脚是否正常工作。该脚本会测试导入导出功能,最好是在测试之前将引脚释放掉,在进行测试,下面是测试149引脚的功能:
root@YY3588:/home/youyeetoo/scripts/00GPIO/adb# ./tests.sh 149
================================
GPIO FUNCTIONALITY TEST
================================
GPIO Number: 149
Test Time: 2026-01-28 10:52:25
================================

[TEST 1] Check initial GPIO state
-----------------------------------
GPIO149 is not exported
To export: ./export.sh 149
GPIO149 is not exported initially
✓ PASSED

[TEST 2] Export GPIO149
-----------------------------------
GPIO149 exported successfully
path: /sys/class/gpio/gpio149
✓ PASSED

[TEST 3] Verify GPIO state after export
-----------------------------------
GPIO149 is exported
-----------------------------------
Direction: in
Value:     0 (LOW)
-----------------------------------
Path: /sys/class/gpio/gpio149
✓ PASSED

[TEST 4] Set GPIO149 to output HIGH
-----------------------------------
GPIO149 direction set to: out
GPIO149 value set to: 1 (HIGH)
-----------------------------------
Current status:
GPIO149 is exported
-----------------------------------
Direction: out
Value:     1 (HIGH)
-----------------------------------
Path: /sys/class/gpio/gpio149
✓ PASSED

[TEST 5] Verify GPIO149 is output HIGH
-----------------------------------
GPIO149 is exported
-----------------------------------
Direction: out
Value:     1 (HIGH)
-----------------------------------
Path: /sys/class/gpio/gpio149
✓ PASSED

[TEST 6] Set GPIO149 to output LOW
-----------------------------------
GPIO149 direction set to: out
GPIO149 value set to: 0 (LOW)
-----------------------------------
Current status:
GPIO149 is exported
-----------------------------------
Direction: out
Value:     0 (LOW)
-----------------------------------
Path: /sys/class/gpio/gpio149
✓ PASSED

[TEST 7] Verify GPIO149 is output LOW
-----------------------------------
GPIO149 is exported
-----------------------------------
Direction: out
Value:     0 (LOW)
-----------------------------------
Path: /sys/class/gpio/gpio149
✓ PASSED

[TEST 8] Set GPIO149 to input mode
-----------------------------------
GPIO149 direction set to: in
-----------------------------------
Current status:
GPIO149 is exported
-----------------------------------
Direction: in
Value:     0 (LOW)
-----------------------------------
Path: /sys/class/gpio/gpio149
✓ PASSED

[TEST 9] Verify GPIO149 is in input mode
-----------------------------------
GPIO149 is exported
-----------------------------------
Direction: in
Value:     0 (LOW)
-----------------------------------
Path: /sys/class/gpio/gpio149
✓ PASSED

[TEST 10] Unexport GPIO149
-----------------------------------
Preparing GPIO149 for unexport...
Set to output LOW
Set to input mode
GPIO149 unexported successfully
✓ PASSED

[TEST 11] Verify GPIO149 is unexported
-----------------------------------
GPIO149 is not exported
To export: ./export.sh 149
✓ PASSED

================================
TEST REPORT
================================
GPIO Number: 149
Test Time: 2026-01-28 10:52:25
-----------------------------------
Total Tests: 11
Passed: 11
Failed: 0
-----------------------------------
Result: ALL TESTS PASSED ✓
================================
- LED blink功能
blink.sh用于控制GPIO控制LED闪烁,参数为GPIO编号、闪烁间隔(毫秒)和闪烁次数。例如:49,闪烁间隔为1000毫秒,闪烁次数为10次:
root@YY3588:/home/youyeetoo/scripts/00GPIO/adb# ./blink.sh 149 1000 10
================================
GPIO BLINK TEST
================================
GPIO Number: 149
Interval: 1000ms (1.000s)
Mode: Blink 10 times
================================

GPIO149 is not exported, exporting now...
GPIO149 exported successfully
Setting GPIO149 to output mode...
GPIO149 is now in output mode

Starting blink (HIGH -> LOW -> HIGH -> ...)...
Press Ctrl+C to stop

[10:58:36] Blink #1: GPIO149 = HIGH (1)
[10:58:37] Blink #2: GPIO149 = LOW (0)
[10:58:38] Blink #3: GPIO149 = HIGH (1)
[10:58:39] Blink #4: GPIO149 = LOW (0)
[10:58:40] Blink #5: GPIO149 = HIGH (1)
[10:58:41] Blink #6: GPIO149 = LOW (0)
[10:58:42] Blink #7: GPIO149 = HIGH (1)
[10:58:43] Blink #8: GPIO149 = LOW (0)
[10:58:44] Blink #9: GPIO149 = HIGH (1)
[10:58:45] Blink #10: GPIO149 = LOW (0)

Completed 10 blinks

Stopping blink...
Setting GPIO149 to input mode...
GPIO149 set to input mode
Blink stopped.
特别说明,为了防止用户将闪烁时间设置过小,导致闪烁过快或者参数传递错误,脚本在检测到闪烁时间过小时不会执行,如果确实需要测试短时间内GPIO的表现,请在命令后面添加--certain参数,例如:./blink.sh 149 20 10 --certain。此外闪烁的参数可以传递0,表示无限循环闪烁。如循环每秒闪烁一次,例如:./blink.sh 149 1000 0。可以使用Ctrl+C停止闪烁。
¶ 3 原理阐述
该操作GPIO的方式本质上是通过瑞芯微预留的接口进行操作的,执行export.sh脚本本质上执行的操作是像sys/class/gpio/export文件写入GPIO编号,例如:
echo 149 > /sys/class/gpio/export
这会将GPIO149导出为用户空间可访问的GPIO。其他操作如设置方向、设置电平等,都是通过写入sys/class/gpio/gpio149目录下的文件实现的,脚本相当于做了封装操作,简化了操作流程。
- 导出GPIO
echo 149 > /sys/class/gpio/export
- 设置方向(输入/输出)
echo in > /sys/class/gpio/gpio149/direction   # 设置为输入
echo out > /sys/class/gpio/gpio149/direction  # 设置为输出
- 读取方向
cat /sys/class/gpio/gpio149/direction
- 设置电平(输出模式)
echo 1 > /sys/class/gpio/gpio149/value  # 高电平
echo 0 > /sys/class/gpio/gpio149/value  # 低电平
- 读取电平
cat /sys/class/gpio/gpio149/value
- 释放GPIO
echo 149 > /sys/class/gpio/unexport